|
|
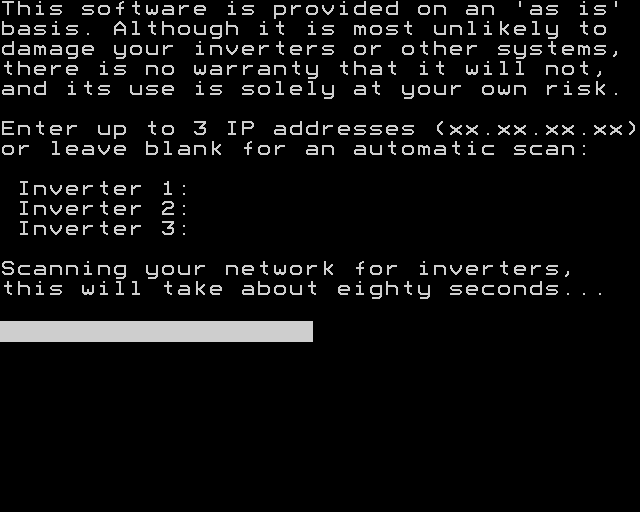
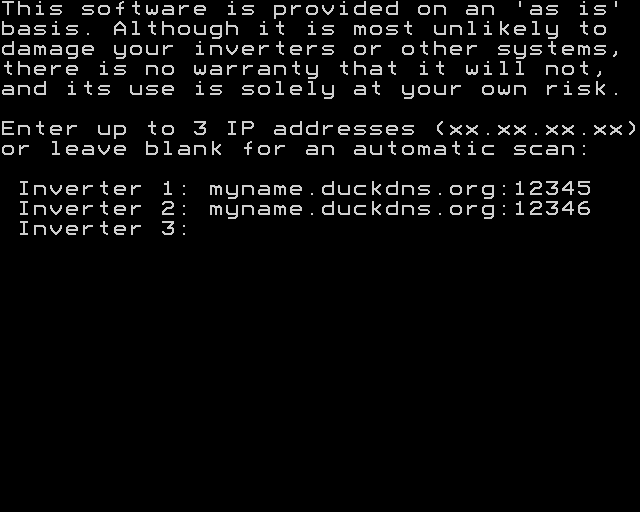
"Contains an incredible amount of information at a glance, I just love it. Beautiful, practical, simple, complete. The best app on my iPhone" (C.S.)This simple app allows you to monitor and control your GivEnergy inverters (AC-coupled, LV Hybrid, All-in-One, EMS, Gateway, HV Hybrid or Three Phase). It operates purely locally, via your home network, so has no dependency on GivEnergy's cloud servers (although it may be possible to configure it to work when away from home). The app supports up to four inverters. When first run, the app prompts for the IP address(es) of your inverter(s); if they are left blank it will automatically scan your local network for GivEnergy inverters (note that this feature does not work in early versions of iOS, nor does it work on a Chromebook). The scan assumes the most common home subnet size (/24, meaning 254 addresses) but if no inverters are found the scan may be extended, up to a /22 subnet (for example as used by the Amazon Eero router). The app assumes that the IP address(es) will not subsequently change, so you should configure your inverter(s) to have fixed or static addresses as described below. If necessary then force the app to request the address(es) again. If you have two or more inverters, and the connection to one fails, the app will attempt to reconnect – but only once, if that fails it will not try again. The app is entirely free and may be downloaded for the supported desktop and mobile platforms as follows:
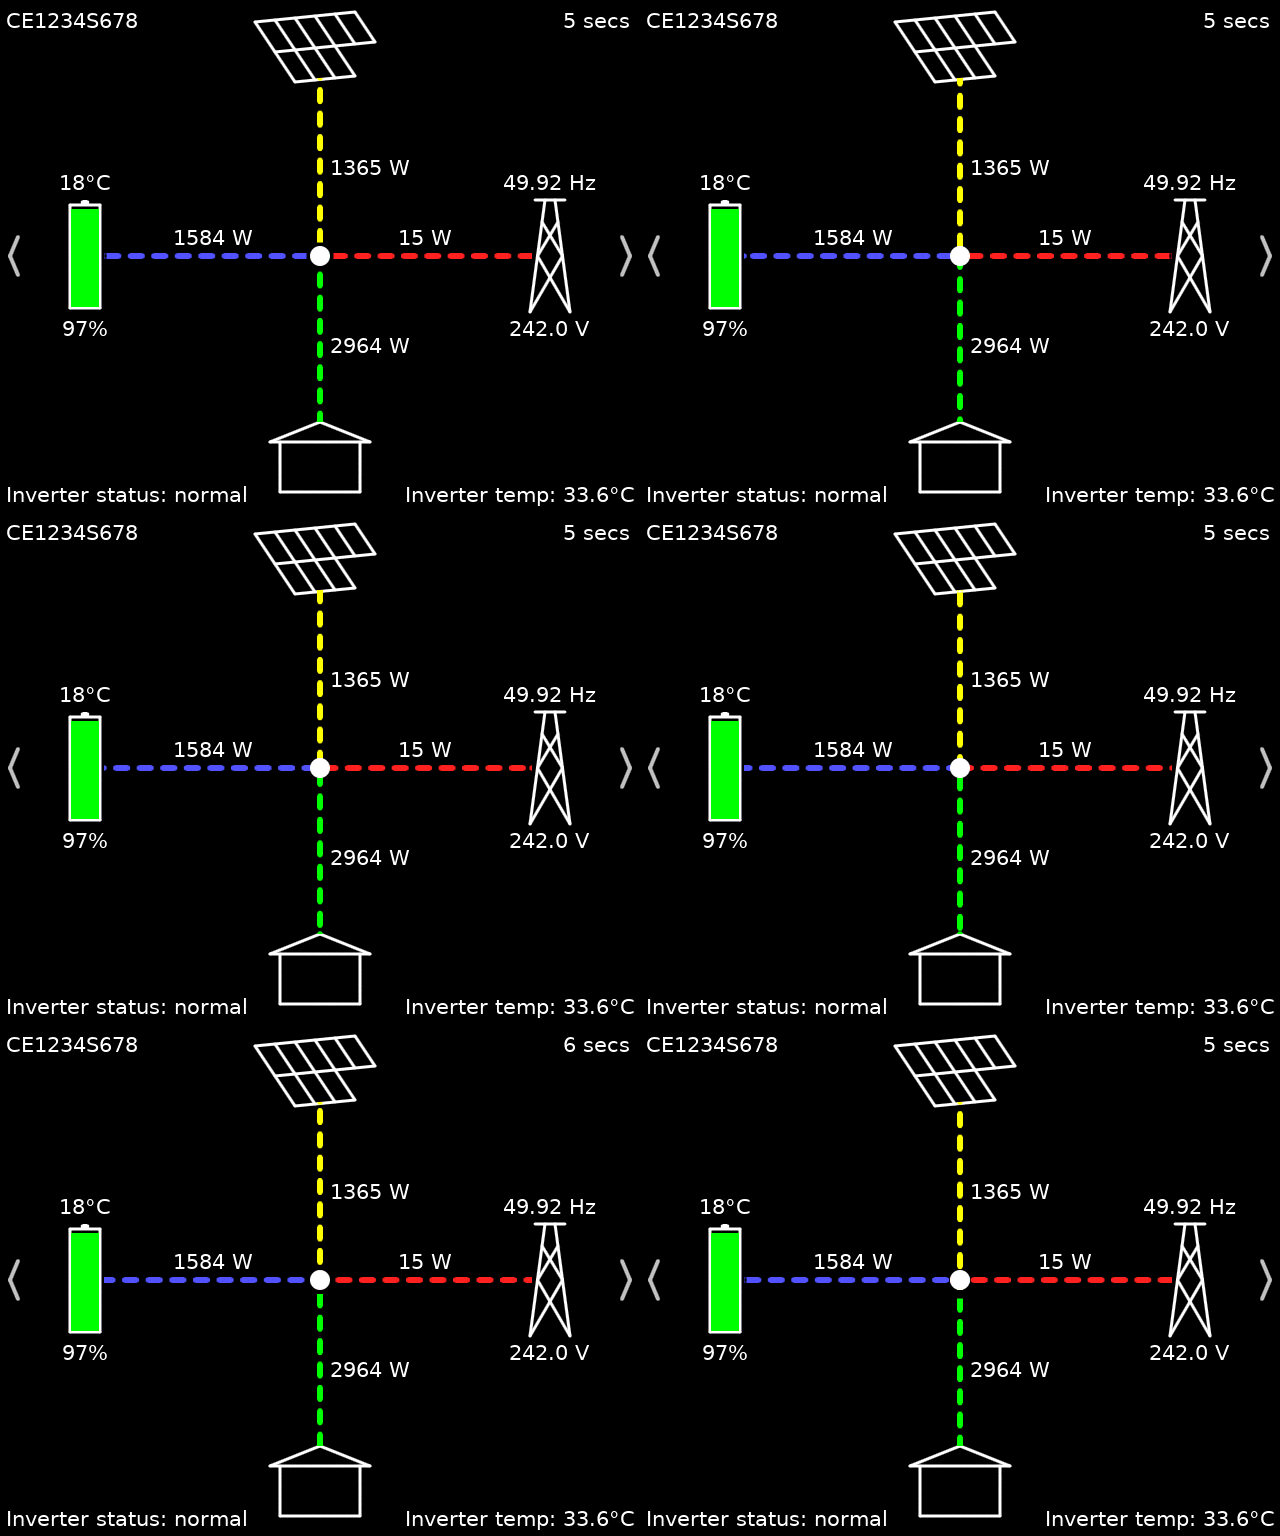
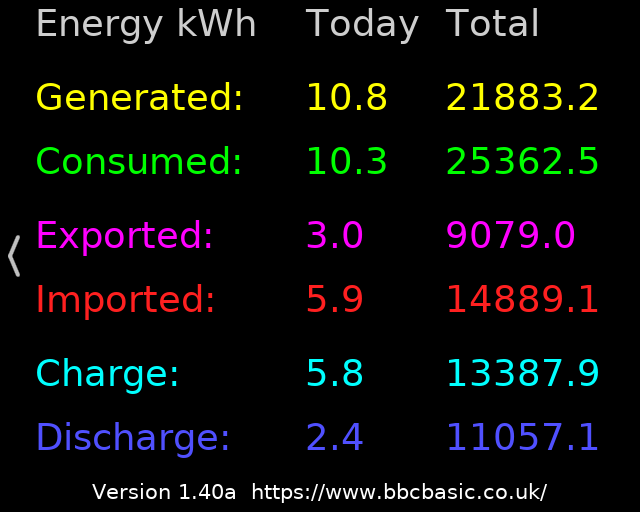
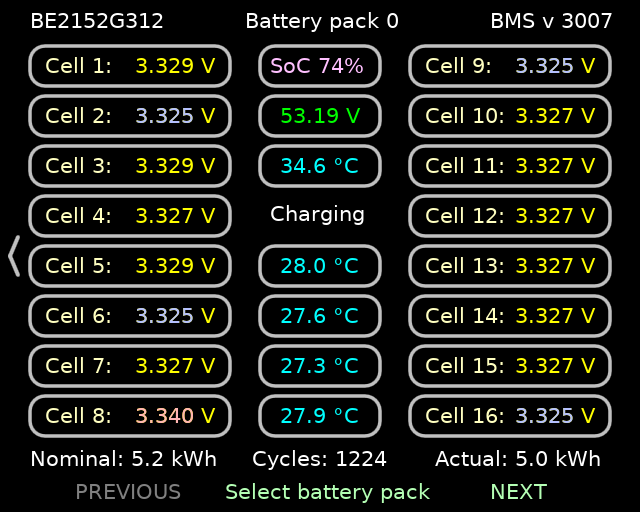
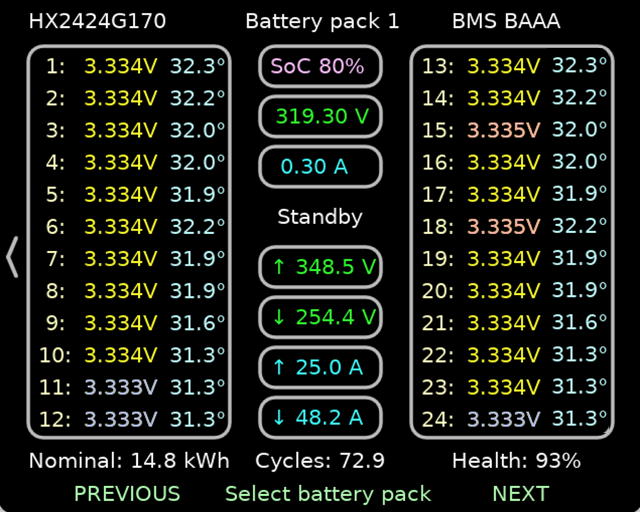
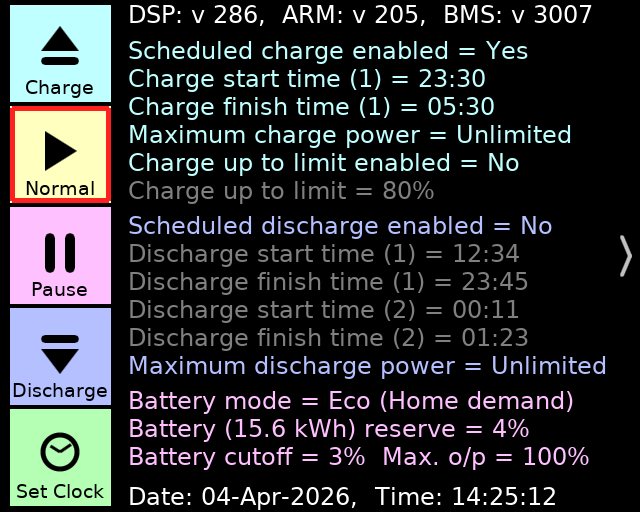
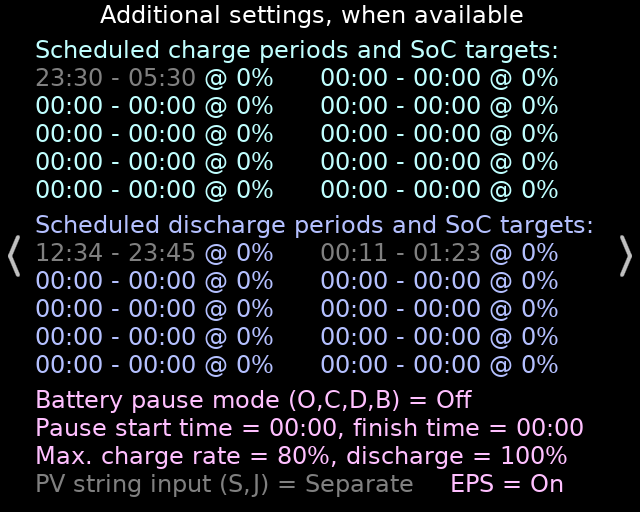
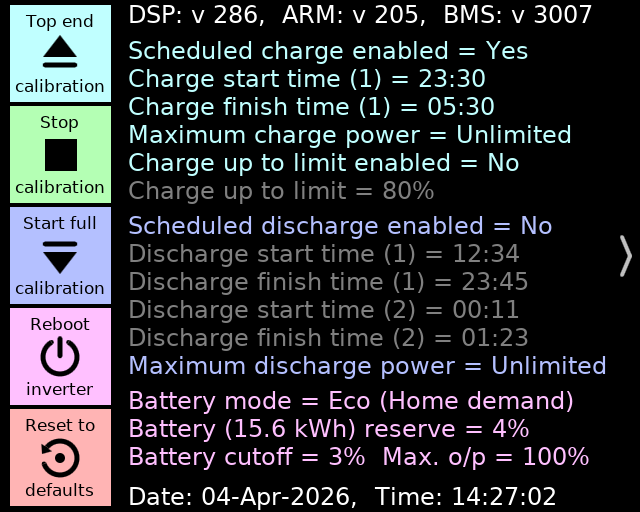
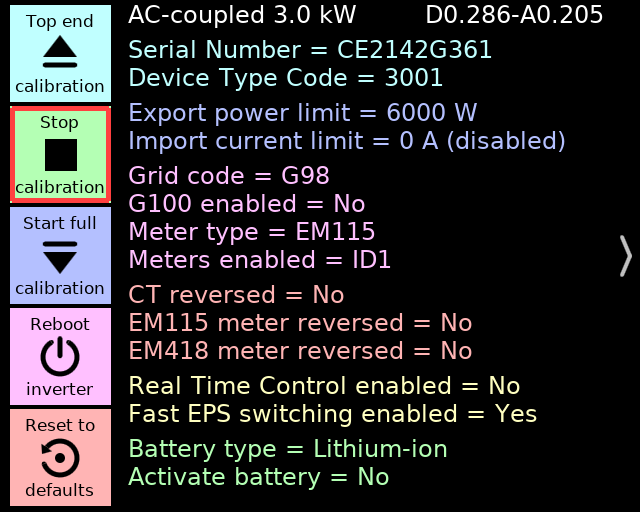
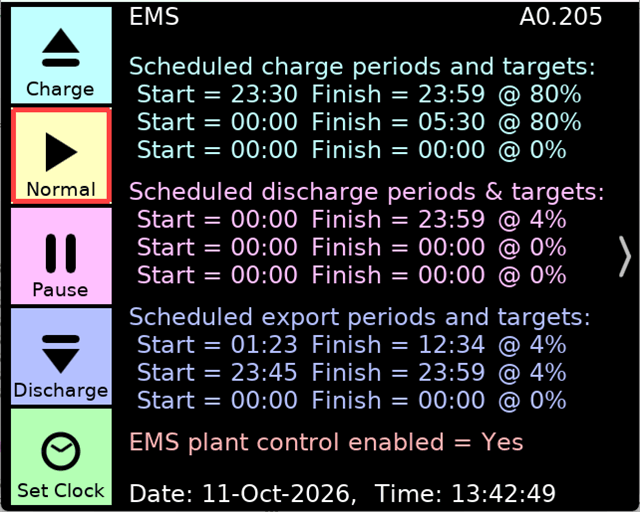
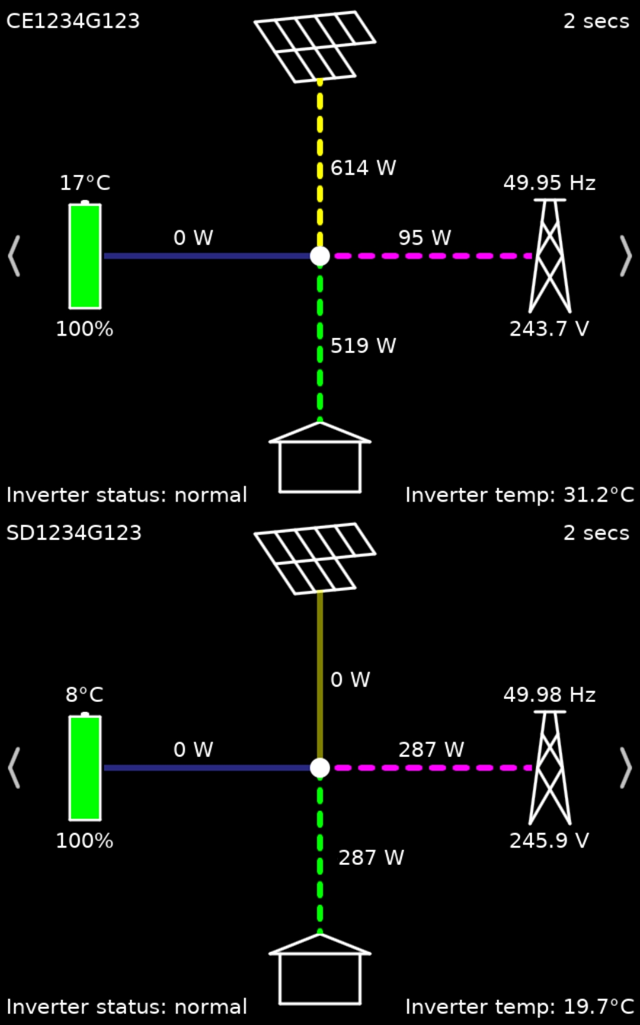
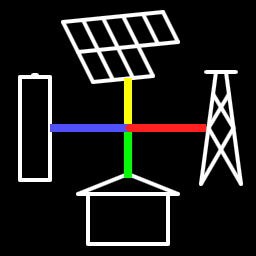
InterfaceThe app has a simple user interface consisting of a single large 'canvas' which can be scrolled both horizontally and vertically. Vertical scrolling allows you to select which of up to four inverters you want to monitor or control. Horizontal scrolling allows you to select between five different 'panes' as follows:Status paneThis is the pane initially displayed (it is the middle pane of the five). It displays an animated graphic of the power output from your solar panels (if any), the power flowing into or out of your battery, the power being imported from or exported to the grid, and your home consumption (which includes the power used by the inverter itself). The powers always 'add up', that is they sum to zero at the central node.Note that the battery charge or discharge power is shown as the AC equivalent. When charging the DC power flowing into the battery will be somewhat less than the value shown, because of losses in the AC-to-DC conversion. Similarly when discharging the DC power flowing out of your battery will be somewhat more than the value shown, because of the loss in the DC-to-AC conversion. GivEnergy inverters are specified in terms of AC power, for example the AC3.0 can charge or discharge at 3.0 kW AC. This pane also displays miscellaneous information, depending on your model of inverter, such as its serial number, status and temperature; the battery's temperature and State of Charge; the mains (grid) frequency and the mains voltage. If you have multiple batteries the temperature and State of Charge are 'average' values. Energy totals paneThis is the next pane to the right; it may be reached from the Status pane by swiping left or clicking/tapping on the right-pointing chevron. It shows today's energy totals (since midnight) and the cumulative totals since the inverter was installed; only in the case of an AC-coupled inverter are all the fields populated. Also shown in this pane is the version number of the app and a link to this web page.Battery details paneThis is the right-most pane; it shows details of your primary battery. If you have additional battery packs you can view them by clicking/tapping on NEXT and PREVIOUS. The maximum number of battery packs which may be displayed is 24 (four stacks each with six packs), but the limit with an ordinary AC-coupled or LV Hybrid inverter is five packs.In the table of cell voltages, those shown in red are the highest voltage and those shown in blue are the lowest. The difference between the red and blue voltages is a measure of how well balanced the cells are. Main settings paneThis is the left-most pane. It shows the main inverter settings — including charge and discharge schedules and battery settings — along with the firmware version numbers and the inverter's date and time. Also, on the left side, are five Quick Settings buttons.The settings may be changed (so long as none of the Quick Settings modes is active). To change a setting click/tap on the current value; this will be cleared and replaced by an entry field with a flashing caret. Type in the wanted value and press Return / Enter; in the case of the Battery mode enter E for Eco (Home demand) or F for Full export. Entering U for the maximum charge or discharge power means Unlimited. Quick Settings buttonsOn the extreme left are five Quick Settings buttons; clicking or tapping on one of the buttons will switch the inverter to the requested state: Charge, Normal, Pause (which pauses both charge and discharge) or Discharge. It is most important that if you select a Quick Settings mode using this app you also return to Normal using this app. The Set Clock button sets the inverter's internal clock to the current time of the device on which you are running the app.Whenever you change a setting a message will appear to indicate that the necessary data are being written to the inverter; this can take several seconds and you should not close the app until this message has disappeared. In the unlikely event that you select a Quick Settings mode on one device, and return to Normal using the app running on a different device, schedules may be restored with only a 10 minutes precision. Important note for EMS and Gateway users: if the batteries are not perfectly balanced, the Pause button may initially attempt to balance the batteries, by discharging the one with the higher State-of-Charge, before they are paused. Additional settings paneThis is the second pane from the left; it will populate only when the inverter firmware supports these settings. Note that schedule start and finish times which are greyed out are copied from the Main Settings pane and must be altered there if required. The SoC targets, and the start/finish times of the remaining slots, are only available on some inverter models; otherwise, attempts to change them will fail.The Battery pause mode should be set to O (Off), C (Charge only), D (Discharge only) or B (Both charge and discharge). Only certain inverter models support scheduled pause, on other models attempts to change the start or finish time will fail. EPS backup output enables (Yes) or disables (No) the Emergency Power Supply in the event of a power-cut, if you have that installed. In the case of AC-coupled and LV Hybrid inverters the percentage maximum charge and discharge rates that you can set in this pane act in conjunction with the Watts limit that you can set in the Main Settings pane. Typically the percentage limit affects only charging from the grid, whilst the Watts limit acts on both charging from the grid and charging from excess solar generation. Maintenance modeMaintenance mode is entered (and exited) by long-pressing on the Main Settings pane just to the right of the Quick Settings buttons (on a desktop platform holding down the Shift key has the same effect). In this mode the five buttons change from their normal functions to Top end calibration, Stop calibration, Start full calibration, Reboot inverter and Reset to defaults. Most of these are self-explanatory, but Top end calibration skips the battery discharge phase of a calibration and runs only the charge and cell balancing phases.Installer modeContinuing to press to the right of the Quick Settings buttons (or holding down the Shift key for longer) will enter Installer mode. In this mode the main settings pane changes to a set of advanced settings. Some of these may be changed, but you should only do this if you understand exactly what these settings do and the possible consequences of changing them. In particular you should be aware that changing some of these settings may contravene the terms on which your DNO (Distribution Network Operator) permits connection of the inverter to the public electricity supply. If in any doubt don't change them.Multiple invertersIf you have multiple inverters they are treated as being entirely independent (as they would be for example in a 3-phase installation with one inverter per phase). If configured as a 'plant' (operating together on the same phase) the app will work but the 'home demand' will be reported incorrectly, however if you have an EMS or Gateway the home demand reported by that should be correct (and only the monitoring features should be used with the individual inverters).Normally only one inverter is displayed at a time, and it is necessary to scroll vertically to select which to view. However in portrait orientation, on a mobile device, two inverters may be displayed simultaneously. Running two or more copiesThe app is designed to be run on multiple devices (up to at least four) simultanously, without risking 'overloading' the inverter(s); you can, for example, safely use it to provide a continuous 'in home display' in more than one room. The way this works is that one instance of the app will take the role of 'master' and poll the inverters, whilst the others listen passively to the replies.However you are recommended not to run this app at the same time as different apps or Home Assistant, for example, as they may interact in unwanted ways and risk the inverter receiving too many polls. Remote accessThe IP addresses entered on the setup pane don't have to be LAN addresses, they can be WAN addresses and port numbers (if you are lucky enough to have a static WAN address) or even a named domain such as one allocated by a Dynamic DNS provider, e.g. myname.duckdns.org:12345. Many routers have built-in support for a free DDNS such as DuckDNS or No-IP.Setting it up that way can enable remote ('away') access, although you will need to configure your router to allow incoming connections from the internet to your inverter(s), e.g. by port sharing. Always use a 'private' port number externally and translate that to the inverter's port 8899. Unfortunately this will not work if you have a CGNAT connection to the internet, as is often the case with mobile and satellite providers. Forcing the app to request the IP address(es) againIf the IP address of one or more of your inverters has changed, or for some other reason needs to be re-entered, you can force the app to request the addresses again by deleting the file which contains them as follows:
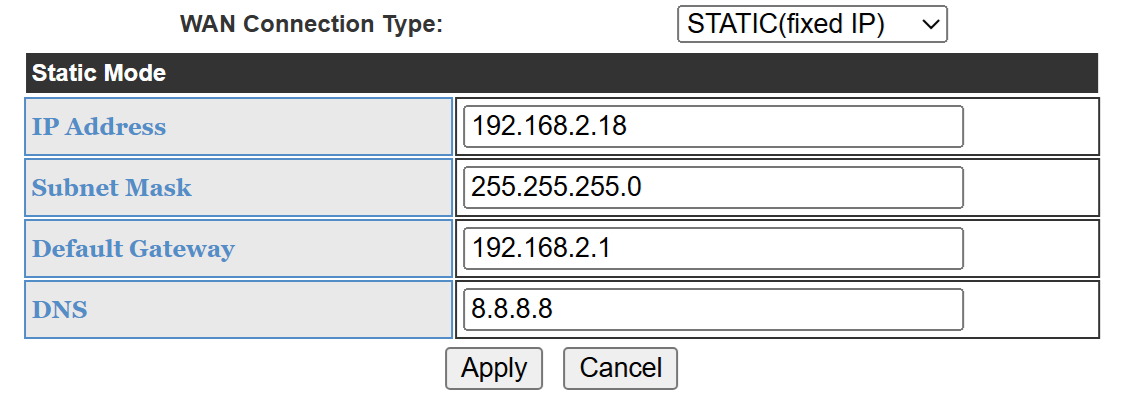
In the case of the desktop platforms enter the listed command at a command prompt, substituting your own user name for <user> as applicable. Setting the inverter's IP address to staticYou should set your inverter(s) to have a fixed/static IP address, either in your router's settings or in the GivEnergy dongle's settings. The router method is usually easier and safer: log into your router's admin interface, find your inverter in the list of connected devices (typically called 'HF-A21' or similar) and look for 'DHCP Reservation', 'Address Reservation', 'Static DHCP', 'IP Binding' or 'Manual Assignment'.Alternatively you can set a static address by logging into the GivEnergy dongle (or internal equivalent), either from your LAN or via the dongle's own WiFi hotspot. Go to STA Interface, select WAN Connection Type as STATIC (fixed IP) and fill in the form shown below. You must choose a 'safe' IP address: one that is not in the router's DHCP range and not in use by anything else. It will probably be necessary to force a reconnection for this to take effect.
Disclaimer"This software is provided on an 'as is' basis. Although it is most unlikely to damage your inverters or other systems, there is no warranty that it will not, and its use is solely at your own risk." |